Art Lesson 41, Part 9
Discover how to Paint Metal Objects in Oil
Learn how to paint like the Old Masters!
Old Masters Academy Online Course
Self-study, self-paced online video courseLifetime membershipOne-time payment: $487Enroll Now!Personal Tutoring online + Online Course
Unlimited tutoring by the Academy teachersLifetime membershipOne-time payment: $997Enroll Now!« Back to the Art Lessons List
How to Paint Metal Objects in Oil
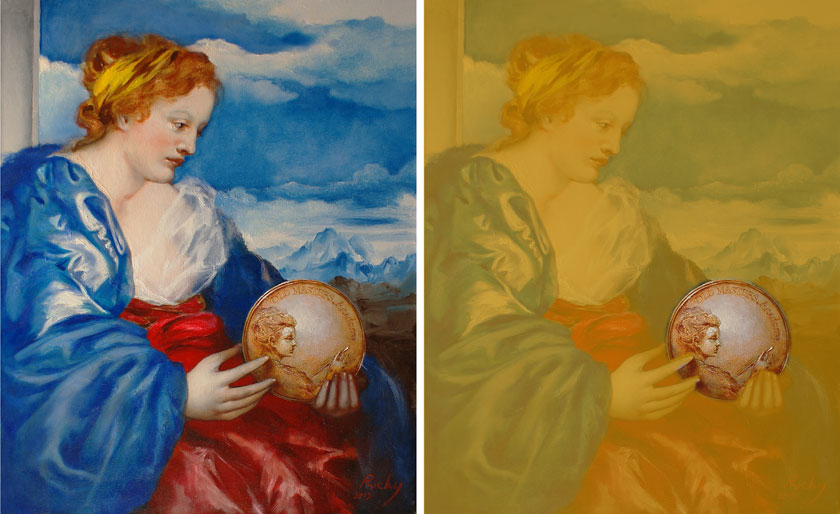
This part is dedicated to painting a medallion.
The initial design was completely different; afterwards, I made a decision to change the composition. The design was completely overpainted. So, now we are at the point where we should redesign the composition and find the right place for a medallion.

Session One
We start with outlining the medallion’s circle. For this, a circle in the desired size can be cut out of paper. Then, using Venetian Red, we make light guidelines. If the surface has an uneven texture, like in our case, scrape out the relief of paint with a palette knife. When we are satisfied with the surface, we can proceed with the Underpainting.
For this first layer, we mix Titanium White with Yellow Ochre. We want the layer be as dense as possible and cover the dark upper background well, that’s why no Medium should be added. The paint is applied densely, however we avoid an impasto effect. That is enough for the first session, now we have to wait till the paint is dry.
Session Two
When the surface is well dried, we continue with the medallion. In this session, we place the shadows with a Glaze of Burnt Sienna and Yellow Ochre mix, thinned with Stand Linseed Oil. The paint should be sufficiently thinned with a Medium to create a transparent coat of paint. (Do you remember, we covered the figure and hands with this Glaze?)
Session Three
The surface is dry and now we can check if the circle’s shape needs any fine-tuning. You can measure the circle with a ruler or by eye and make any corrections, if required. Mark the sides that should be enlarged and apply the next layer of the Underpainting. There is no need to use a compass, the outmost precision is not necessary here.
At the moment, the medallion looks too yellow, let’s make it lighter. We prepare the same mix of Titanium White with Yellow Ochre, but now in different proportions – less Ochre should be added to the White. We add no Medium to the mix.

This coat of paint will add more protective thickness between the dark background laying underneath and the light surface. It also adds additional volume to the painting’s surface. At the same time, we correct the shape of the medallion.
Session Four
Let’s prepare the medallion’s design on a piece of tracing paper. We use an enlarged image of a medallion and outline it from a computer screen.
After an outline is done, we reverse it on the back side and rub the charcoal powder on the paper. As you see, we left the empty places between lines uncovered. Shake off the remains of charcoal and fix the paper to the canvas. We placed pieces of masking tape in advance, while the paper wasn’t smeared with the charcoal.
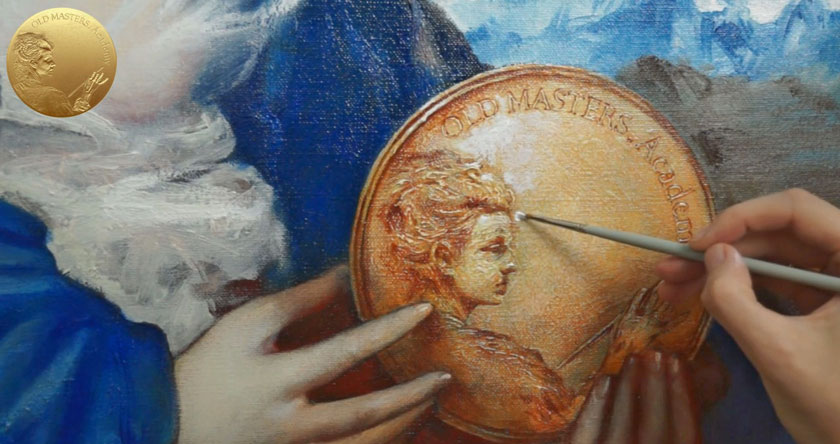
After we have outlined the image, we can proceed with the painting. We mix Yellow Ochre with Venetian Red. No Medium is added. With a small size synthetic brush, we apply thick strokes of paint in areas of shades.
The letters should also be outlined only in places of cast shadows. Such places are easy to establish: imagine that a source of light is located above and a bit to the left, like 11am on a clock’s face. The shades will fall on the opposite side, respectively.
I did not follow the character of lighting that was on the medallion image, which is lighted from below. But on the contrary, I establish more common lightning from above.
Then we add Stand Linseed Oil to Titanium White. The paint becomes stretchy and viscous. This makes the perfect condition for making small size impastoed relief strokes. Now the letters looks really embossed on the surface.
We continue with Underpainting in other places. By using the same viscous paint, we work on the lightened areas of the medallion. We deliberately make the strokes visible – they form a relief surface. The small brush helps us leave many fine relieved brush-strokes.
At the end of this session, we improve the shaded areas of the portrait with the mix of Yellow Ochre with Venetian Red, which we used at the initial stage of outlining the figure on the medallion.
Session Five
By this time, the paint layer has dried. Here is another change in the design. This time we amend the inscription on the medallion. During the course of creating this painting, we came up with a better name for our Academy, so it needs to be reflected on the medallion.
We already know how to deal with such cases – first we scrape the surface to even it up. Then we overpaint the treated area with a coat of Underpainting. When the paint is completely dry, we can continue painting as required.
Session Six
After the surface was completely dry, we traced and outlined in paint a new inscription. This is exactly the same process that we did in the first place.
Session Seven
We apply a Glaze over a completely dry surface. The Glaze is an already familiar mix of Burnt Sienna and Yellow Ochre thinned with Stand Linseed Oil. This is the Glaze that we repeatedly used for the skin, now it serves well for the medallion. The excess Glaze can be gently removed from the surface with a piece of tissue.
Session Eight
When the Glaize is well dried, we apply another layer of highlights. For this, we mix Titanium White with Stand Linseed Oil. When the Glaze layer is painted on top, we put the canvas aside to dry.
Session Nine
The previously applied paint is dry, so we proceed with another Glaze. We mix Indian Yellow and Yellow Ochre with Stand Oil. Try the mix over a spot, and add more Indian Yellow or Ochre accordingly.
Use a large size Hog brush to remove the paint that is on the very surface. Burnt Sienna can be used in places of the deepest shadows. Add Stand Linseed Oil for better flow. Apply the Glaze in various transparencies over the shaded areas of the medallion. That it for the session, we can leave the painting aside to dry till the next session.
Session Ten
When the Glaize is well dried, we proceed to the next step. By using very fine sandpaper, we scrape away the paint lying on the relief surface, exposing the lighted lower layers of the Underpainting. The Glaze that flows into the grooves on the impastoed layer remains unscraped.
In such a way, we achieve an optical effect that can’t be achieved by direct painting. This method is called “Sgraffito”.
To get rid of the dust, soak a piece of cloth in Turpentine or White Spirit and wipe the surface.
While the Solvent evaporates, which happens quite fast, we prepare the next transparent Glaze. For this glaze, we use pure Ultramarine and Stand Oil, nothing more. It is a very simple mix.
We apply this cold Glaze in a transparent coat. Here, you can see the rule of Opposite Colors in action – Ultramarine, applied in a transparent coat, neutralises the bright orange-yellow in a very subtle way. It adds metallic coolness to the medallion. This short session is complete and now we have to wait till the surface becomes dry.
Session Eleven
When the paint has dried, we proceed to the final step. For this, we need pure undiluted Titanium White. To make the final touches, we will use a soft natural brush. We apply paint in separate impastoed strokes on the model’s face. In places that are most highlighted, as well as on the flat area of the medallion, we apply paint quite thickly. Then we spread the paint around using the Dry Brush method.


