Art Lesson 32, Part 4
How to use Direct Method in Oil Painting Underpainting
Learn how to paint like the Old Masters!
Old Masters Academy Online Course
Self-study, self-paced online video courseLifetime membershipOne-time payment: $487Enroll Now!Personal Tutoring online + Online Course
Unlimited tutoring by the Academy teachersLifetime membershipOne-time payment: $997Enroll Now!« Back to the Art Lessons List
Direct Method in Oil Painting Underpainting
This very simplified version of the multi-layered technique has been adapted by contemporary artists. Let’s look at it, anyway.
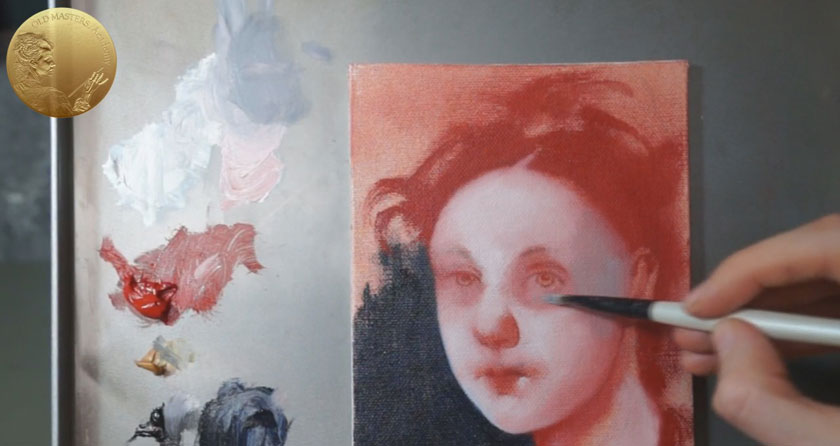
We proceed from the Underdrawing stage. You see, we have barely visible guidelines of the portrait outlined here. What we are going to do now is paint a Color Underpainting. As usual, we choose the Titian Limited Palette, which includes: Titanium White, Venetian Red, Yellow Ochre and Mars Black; we also added French Ultramarine to the palette, which is optional.
We start with outlining the guidelines with the Red. We outline the eyes, nose and lips with a small round brush; the large areas can be outlined using a bigger brush size.
At this stage, we can block in the background with a Blue-Black mix. We proceed as usual, and turn the canvas upside down to more comfortably paint the very border of the face silhouette.
Then, we take a Big Hog Brush. It should be clean. Energetically rub the freshly painted outlines, spreading the paint in the way we do when Scumbling. This is the same as the Dry Brush Method.

We do Dry Brushing all over the painting, spreading paint over the background and the portrait. Why do we need apply this method here? This is our first painting layer that should be continued wet-on-wet in full-color. We need to have our first layers thin to prevent them from intermixing with the following layers. The Dry Brush method is a very handy method for that – the paint is rubbed into the canvas with minimal thickness. When we gently apply paint over the Dry Brush layer, the lower and upper will not be intermixed. So, we can control the process easily.
We mix a skin color now, for the lightened areas. We apply the mix opaquely, avoiding any intermixing with the lower Dry Brushed Red layer.
The less paint that is on the brush, and the more pressure we apply, the more chances that the skin color intermixes with the lower Red color. That is exactly what we need in the half-shaded and shaded parts of the face. Our portrait is beginning to emerge, but at this moment, it looks too warm. We should add some cold nuances to that. We add a tiny amount of Black paint to the skin mix and apply it in shades in a thin coat. This cold mix can also partially intermix with the lower layers of paint, and that’s ok. In such way we can gradually integrate the cold tone into the warm tone and make a smooth transition between the lighter and darker parts of the portrait.
We continue with the eyes – quickly, in a few strokes, we place a pupil, outline the iris and roughly draw eyebrows with the brush.
We work on the details of the facial features with pure Venetian Red, outlining the nostrils and the very structure of the nose and lips.
Eyes also should be depicted in more detail – we work on the eyebrows first, smoothing the rough brush stroke with a clean soft brush. Then, we make the eyes’ shape more precise. Here it is; we are done for now.


