Art Lesson 29, Part 4
In this lesson, you will learn what Direct Painting Technique is
Learn how to paint like the Old Masters!
Old Masters Academy Online Course
Self-study, self-paced online video courseLifetime membershipOne-time payment: $487Enroll Now!Personal Tutoring online + Online Course
Unlimited tutoring by the Academy teachersLifetime membershipOne-time payment: $997Enroll Now!« Back to the Art Lessons List
Direct Painting Technique
After our Brush Sketch is dry (two days are enough for that), we are ready to proceed with painting. Since the diluted paint was applied as thinly as the watercolor and the paint itself, we expect the paint to dry qickly. Venetian Red is a fast drying paint.
This Brush Sketch is the only step that differentiates this Alla Prima variation from the previously shown Alla Prima examples painted straight over Imprimatura, without any additional Underdrawings or Brush Sketches.

In fact, when we painted the previous variations of Alla Prima, we did more or less the same – we painted a sketch first, then we proceeded with painting in Colors straight afterwards. So, now we do more or less the same process, only the Brush Sketch is already dry, and it cannot mix with the upper layers we apply over it.
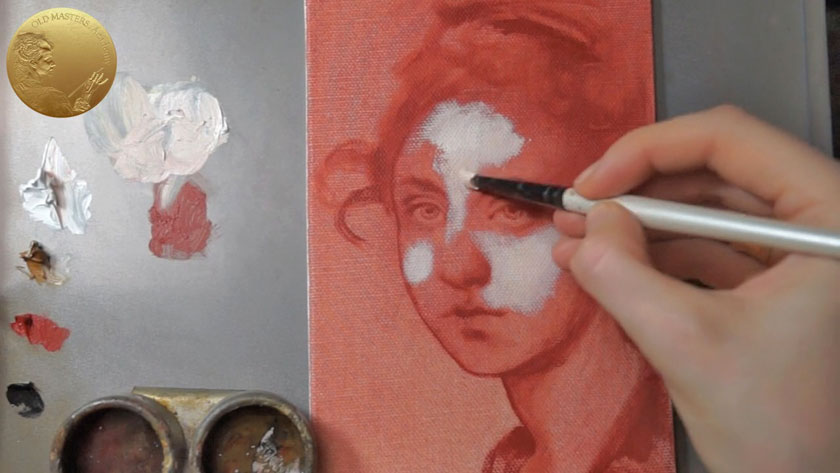
So, what do we do here – we add a bit of Yellow and Red into White, and now we apply this skin color in the same manner we saw in the previous Video Lessons. We cover the lighted areas with paint, then we spread it thinner in shades. At the end, we get pretty much the same result we got when we applied the skin color over the wet Brush Sketch.
Then, we fill in the background with the dark mix of Red and Black. At the beginning, we apply the paint side-by-side with the face oval, and afterwards, we use a clean brush to make the border between the face oval and the background look a bit blended. At the same time, we can correct the shape of the contour while the paint is wet and under our control.
We should gradually build up the light areas so that we apply the skin color mix quite densely. In such case, the more lighted parts of the face will be the more volumetric and seemingly tangible.
We paint irises in the same manner we did previously. And we mix colors accordingly – we add more Black to the background mix to outline the iris and its pupil; and, we add more White for the iris’s lighter parts. And of course, we place white highlights to make the eyes look more vivid.
It’s time for shades and half-tones. We test the grey mix that we already premixed on our Palette. If you place a dab of it on the canvas, you can immediately see if it has the right color or not. Like we do here – we try and we see that the color is too light, so we darken it and add a bit of Red to make it warmer.
We place that bluish color in all shaded areas. We apply the color quite roughly because our next step will be adding even more skin color and blending and shading these two light tones, a making gradual transition between them.
We also have to make the facial features more accentuated. In such way, step-by-step, we proceed with the painting – we accentuate details, then we work on shades, and after that, we come back to the details again… and so on, till we feel satisfied with the result. Such a process, from details to the general and back to details was a natural way of proceeding with the painting to many of the Old Masters.
And, at the very end, we place highlights to emphasize the three-dimensional form on our two-dimensional surface.
That’s how our finished quick study looks. It is made in the Alla Prima technique over a dry Brush Sketch.


