Art Lesson 28, Part 4
In this lesson, you will discover Glazing over Alla Prima
Learn how to paint like the Old Masters!
Old Masters Academy Online Course
Self-study, self-paced online video courseLifetime membershipOne-time payment: $487Enroll Now!Personal Tutoring online + Online Course
Unlimited tutoring by the Academy teachersLifetime membershipOne-time payment: $997Enroll Now!« Back to the Art Lessons List
Glazing over Alla Prima
Now, imagine we have finished our Alla Prima painting, but afterwards, we decided to add some additional glazes.
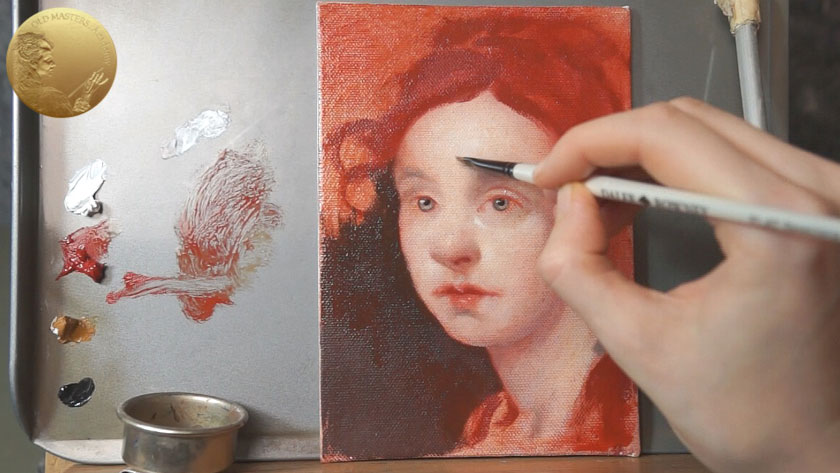
First of all, our Alla Prima layer should be well dried before we can proceed with the Glazings. As a glazing Medium, we choose undiluted Stand Linseed Oil. Our Alla Prima is perfectly suited for the role of Underglazing – it’s very light, so Glazing layers will not dramatically darken it; and it’s quite cold, which also works for us positively. In the end, we will get a brilliant optical effect with warm transparent and semi-transparent glazes; we will feel cold colors going through. But, let’s see the stages of building up layers of glazes.

We apply the glazes using any soft brush. It can be synthetic or natural; it’s also helpful when we spread the paint with fingers. Usually, warm glazes are applied to the following key-places: the lips, the lower part of the nose and the cheeks, of course. We have to apply thin layers of Glazes, then leave the painting aside to let it thoroughly dry before applying a new portion of glazes.
Well, we continue our painting after it dries for about a week. Let’s do the following experiment. Let’s decide that the portrait and the whole painting in general is somehow too cold and we need to make it warmer. We take Stand Oil and add Yellow to it—that’s it. Then, we take a stiff Hog Brush and energetically rub the paint all over the canvas. We can add a bit of Red to cover the background.
Now, when the paint is evenly spread, we do the next step – while this glaze layer is wet, we need to paint highlights over it. We take Stand Oil and add Titanium White to it. Now, we are able to integrate highlights into the glaze layer; they effortlessly blend together and form a beautiful semi-transparent Glaze we call Velatura.
If you glaze the painting with multiple thin glazes, one over another, they look more attractive than when you apply them in one go. Titian was particularly fond of multiple glazings. According to his contemporaries, he could make up to 40 glazing layers. Then, again, we leave the painting to dry.
When it’s dry, we take Scarlet Lake, a very beautiful semi-transparent color and apply it in the form of a glaze over our background. The result is a stunningly bright Red, that can be achieved only in collaboration of Glazes with a White Background underneath.
And at the very end, we can make a few light strokes indicating the highlights on the hair.
That’s it. Our exercise is complete. It’s not Alla Prima in its strict sense anymore because we have already dealt with layers that have different structure and different mediums. But to keep the process understandable, we name it “Alla Prima with Glazing.”


