Art Lesson 35, Part 5
In this lesson, you will discover How to Oil Paint in Glazes
Learn how to paint like the Old Masters!
Old Masters Academy Online Course
Self-study, self-paced online video courseLifetime membershipOne-time payment: $487Enroll Now!Personal Tutoring online + Online Course
Unlimited tutoring by the Academy teachersLifetime membershipOne-time payment: $997Enroll Now!« Back to the Art Lessons List
How to Oil Paint in Glazes
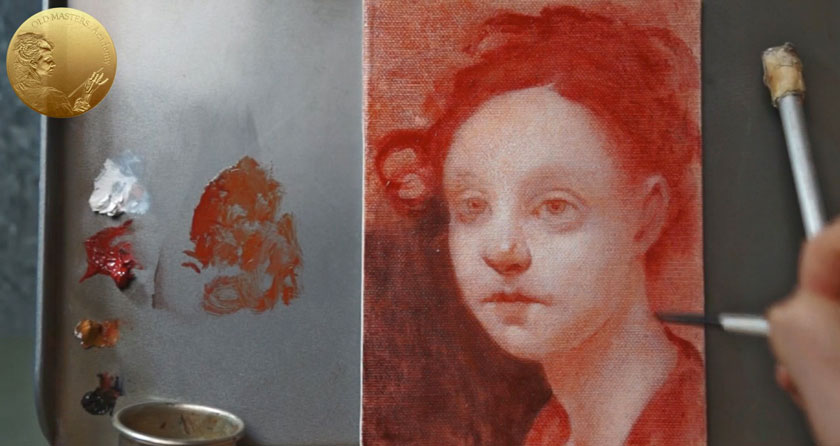
In this video lesson, we are going to finish our painting in transparent and semi-transparent Glazings. As always, our Glazing Medium is Stand Linseed Oil. We start the painting by shaping up the facial features. We dilute a bit of the Venetian Red in Stand Oil. For more of a darker tone, we add a tiny-tiny bit of Black. We outline details with a round small brush. Then, we use a wider flat brush to distribute the paint smoothly.

Then, we block in the hair with the transparent glaze of Venetian Red. We block the background in the same manner – with the mix of Red and Black diluted in Stand Oil.
This is enough for today’s session. We will continue after the surface dries up. We put the painting off to dry. When it’s dry, we continue painting. Let’s set up the hair as a darker, abstract mass.
After that, we can proceed with the portrait again. We will cover it entirely with the transparent film of reddish color to mute the whiteness of the skin. For this, we mix a big amount of Stand Oil and a tiny portion of Yellow and Red. Then, we rub the mix into the canvas with a rigid Hog Brush.
While the glaze is wet, we change the hog brush for a smaller size and a softer haired brush; and using the same mixture of paint, we work on the shaded areas. As you see, now we apply the paint more thinly and opaquely. Now, we have to wait till our glazes dry to proceed with the painting.
This is our third session of working with glazes. We just touch up the shape of the lips and nose, to make them more three-dimensional.
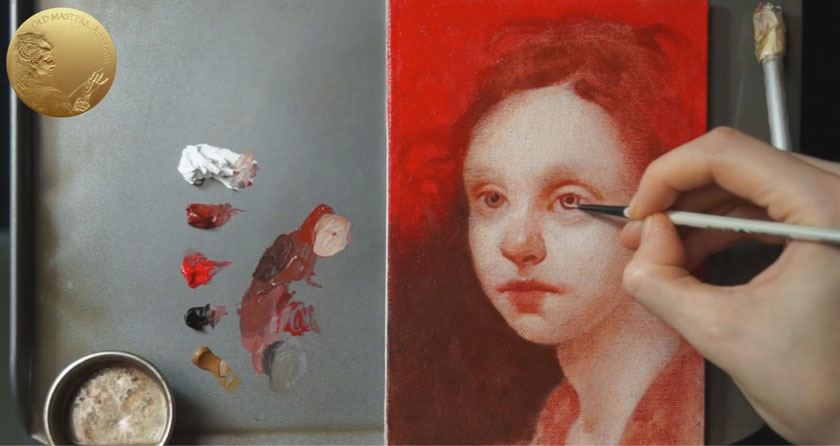
We also cover the red background with a Scarlet Lake glaze. Now, the background looks intensively, vividly red. That is it for today; let’s wait till our glazes become dry.
Glazing session number four. We take the smallest brush and set up shades at the eyelid, making the shape of the eye appear more pronounced. Then, we add volume to the lips.

And finally – we should finish eyes’ irises. The process is familiar already – we paint pupils with a Red-Black mix; then, we outline the profile of the iris. After that, we mix a lighter color paint and finish the iris. We finish with the reflected lights and highlights on the nose and lips.
And for the very final touches of the brush over the hair, mark the highlights loosely on the hair mass.
Yes, there were 4 glazing sessions, but you shouldn’t follow the steps exactly as I did, but just grasp the idea of painting in Glazes. Actually, 4 glazed sessions is not many; in this exercise, I accelerated the speed of painting process to make it not very long.
In the last section of the Old Masters .Academy ™, I will demonstrate the process of artwork creation. There, you will see how all these principles of multi-layered painting will be applied in real practice.


