Art Lesson 54, Part 1
Discover How to Paint a Portrait
Learn how to paint like the Old Masters!
Old Masters Academy Online Course
Self-study, self-paced online video courseLifetime membershipOne-time payment: $487Enroll Now!Personal Tutoring online + Online Course
Unlimited tutoring by the Academy teachersLifetime membershipOne-time payment: $997Enroll Now!« Back to the Art Lessons List
How to Paint a Self-Portrait
In this video you will see the process of making a portrait in a rapid laconic way.
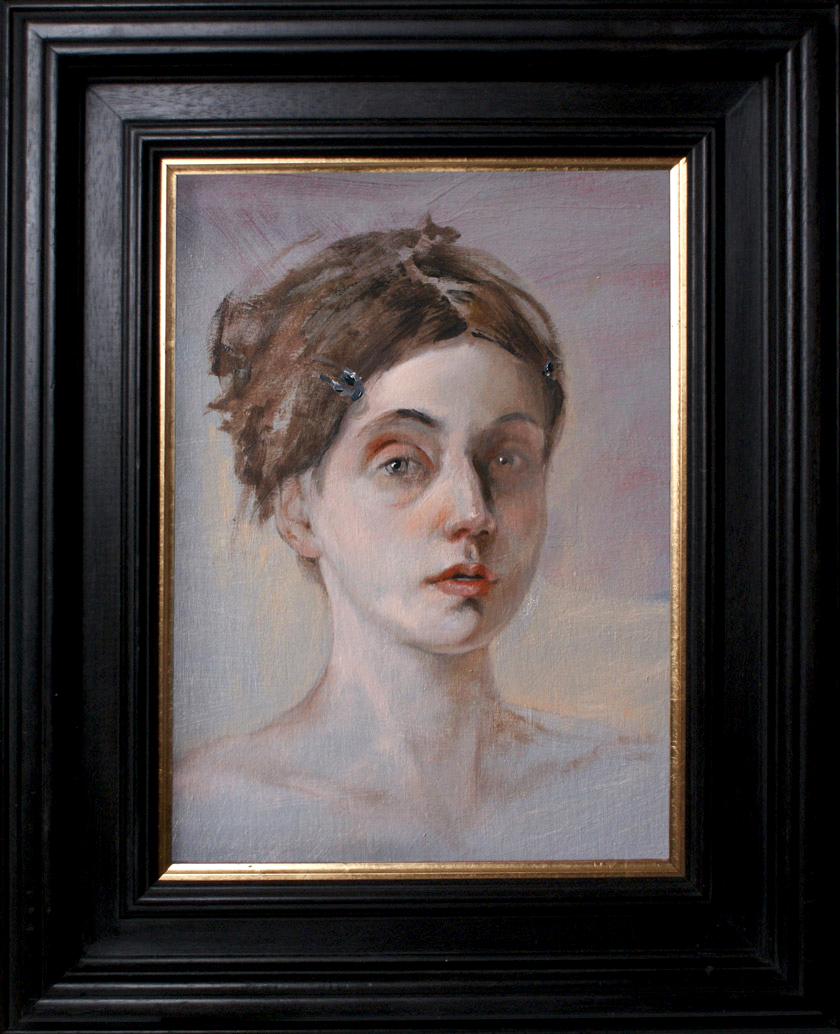
At the same time it is a preparation for a large and serious composition. Such oil portrait sketches play an important role in studying the sitter’s mimics, facial characteristics and details. Going this way you can not only familiarize yourself with the sitter’s unique portrait characteristics but also make better progress painting large pictures next time. Such portrait studies are indispensable for practicing portrait painting. The more you make rough sketches in oil the better you become as a portrait painter. A canvas board is to be used. You can also use the canvas on stretchers if you wish. As this will be just a quick study, any material available will do. For example, you may use primed cardboard or special paper for oil painting.
In our case we use a canvas board primed with the light-grey background. The background was painted by the mix of Titanium White, Ivory Black and Burnt Sienna. It is absolutely we start painting. The background is semi-transparent with the red and white colors seen under it. This combination of colors results in an uneven tone, which is fit for the intent.
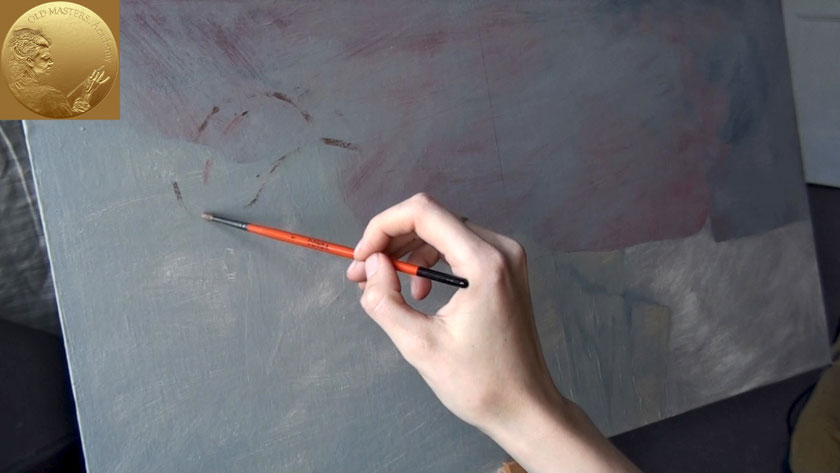
Our canvas board is bigger than necessary. That is why on the canvas we have to mark the edge of the to-be picture. When the picture is finished we’ll cut the board as required. We begin the portrait painting with the constructive lines, that show the proportions of the head. We use a brush for drawing and one tone is applied at this stage – the mix of Yellow Ochre, Raw Umbra and Naples Yellow. You may use your finger as well as the brush.
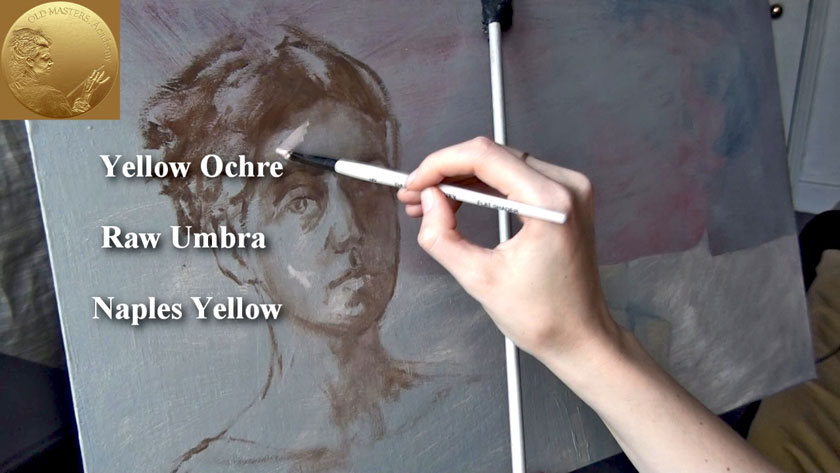
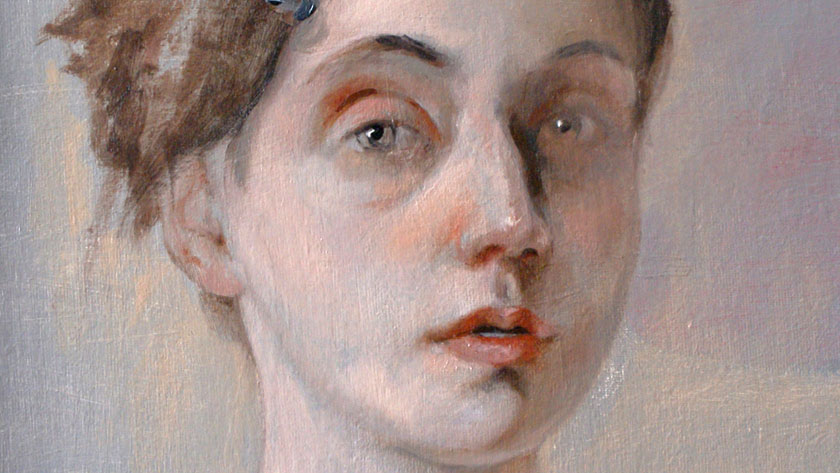
You see that this first layer of paint was made with the help of both: lines and tone. The lines outline the head and the facial characteristics, while the tones show the gradation of light and shadow. Everything was painted with the help of the same mix of pain. The darker areas such as hair, the contours of the eyes and the eyebrows were painted in a thicker layer. The other areas, such as the right chick and the neck, were painted very thinly – the paint was rubbed with the help of a brush or a finger.
We used the following mix to make the tone of the skin: Titanium White, Scarlet Lake, Cadmium Orange and Naples Yellow. This flesh color was applied with a soft flat brush and was rubbed into the canvas in a semi-transparent way, so that the primed cold background could be seen underneath the paint. This step is done so that the tone of the skin was slightly darker than necessary. It will be lightened later. So in this case we work from the dark to the light.
At this stage we add more colors to the picture. As this portrait is meant to be a full color picture, the monochrome under-painting serves as the initial preparatory sketch.
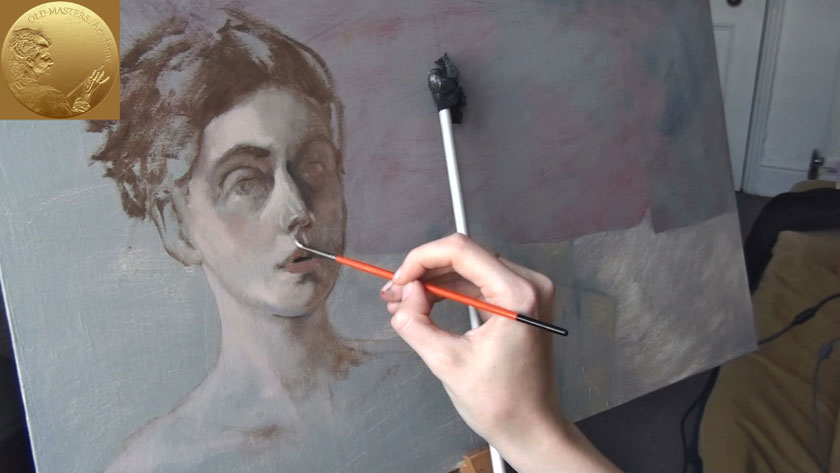
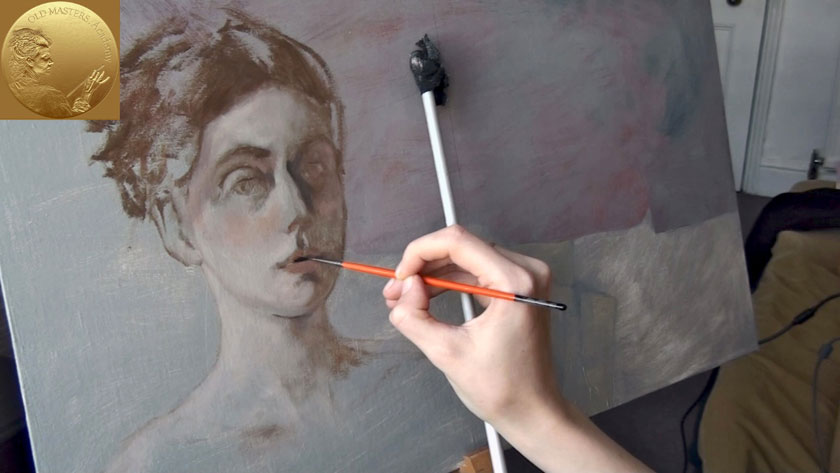
We make the shade behind the nose – this will be the darkest area of the face. Pay attention to the contrasts between the light and dark places of the face. At this point you can decide on the level of contrast. This border between the light and shade lies behind the nose down to the lips and chin.
The process of painting moves from the main masses to details. First, we paint the lips as a single spot of the tone, and then work on smaller details. At the same time we do our best to preserve the likeness of the portrait.
We continue painting the light side of the portrait, to achieve the 3D appearance of the face shape. In the brightest areas we make the lights lighter. Also, you have to make sure that the brightest area of the portrait isn’t getting white – the highlights should still have the true flesh tint color.
Try to Keep to the natural color all time and do not use the pure white for the skin color. As this portrait is painted in a realistic manner, the brightest tones of the skin have to be of natural colors. However, in some other special cases you may find it necessary to use the white paint. Even in the brightest lightening conditions the skill will remain with some color other than white. It’s better to use soft brushes for painting the whole portrait, except for the rough sketch. Soft brushes help to achieve soft brushstrokes appropriate for painting the portrait.