Art Lesson 45, Part 4
Discover How to Paint Figures in Oil
Learn how to paint like the Old Masters!
Old Masters Academy Online Course
Self-study, self-paced online video courseLifetime membershipOne-time payment: $487Enroll Now!Personal Tutoring online + Online Course
Unlimited tutoring by the Academy teachersLifetime membershipOne-time payment: $997Enroll Now!« Back to the Art Lessons List
How to Paint a Portrait in Oils
In this example you will see the pure alla-prima technique. The whole portrait is started and finished in one day with no waiting for the layers of paint to dry. Of course, you can have some breaks during the session. However, it would be better to finish the portrait in a day, so that the drying of the layers didn’t happen. The Alla-prima is a good technique when both: the speed and the quality of the final result are required. This technique gives the strongest and the most flexible layer. Moreover, such a painting will be quite resistant to crack.

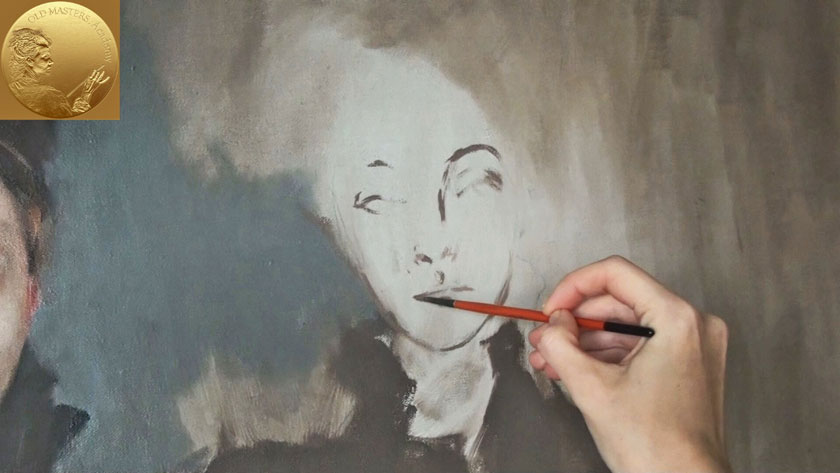
We proceed to the outline of the portrait in paint. As you remember, we already have the graphite pencil drawing. This will be helpful. For outlining we use Vandyke Brown mixed with Buff Titanium with no medium to outline in color. This under-painting is a bit lighter than the under-painting of the previous portrait.

The hair and a bit later the collar are just indicated to establish the color mass in comparison with the face. Use the same brown mix as you did for the under-painting of the face. Just add a bit more Vandyke Brown for the hair and the second girl’s cloths.
It’s high time to add the flesh tone. This tone fills in all the empty spaces on the light grey background. Use a round thick brush, which helps to take a considerable quantity of paint to cover the surface of the canvas with this paint. When applying the alla-prima, you can easily mix the flesh tint with under-painting right on the canvas. This allows to make new tones between the light and the shadow. Add some red-pink color to the girl’s cheeks, mixing it with the flesh tint. Apply gradual transition from the red-pink to the flesh tint as necessary.
Smooth over the borders between the hair and the forehead, as well as between the other parts of the face, so that no sharp solid border was present. There is no reason to use any medium such as Turpentine at the alla-prima session. At the same time make sure that your layers of paint are not too thick. Otherwise you may end in a layer of paint that will be difficult to change in tone or color.
If the layers are thin and are easily rubbed into one another you will have enough flexibility for both: to work as required and to do the changes and the correction. Work with your brash in the “put some paint and rub” way. The brush should be both: mid-stiff and resistant one.
Pay your attention to proportions of the face. Until this stage the face had approximate outlines before this very stage. It’s high time to establish a more precise shape to the face and try to achieve the likeness of the sitter. For these details you can use another brush – small and round. With such brush you can apply smooth and precise brushstrokes. This brush goes easily on the surface of the canvas.

Step by step the details of the face are getting the shape and the correct colors. This is achieved by working on the more precise details. You not only fill the canvas with the color, but also draw the face with the shape and color.
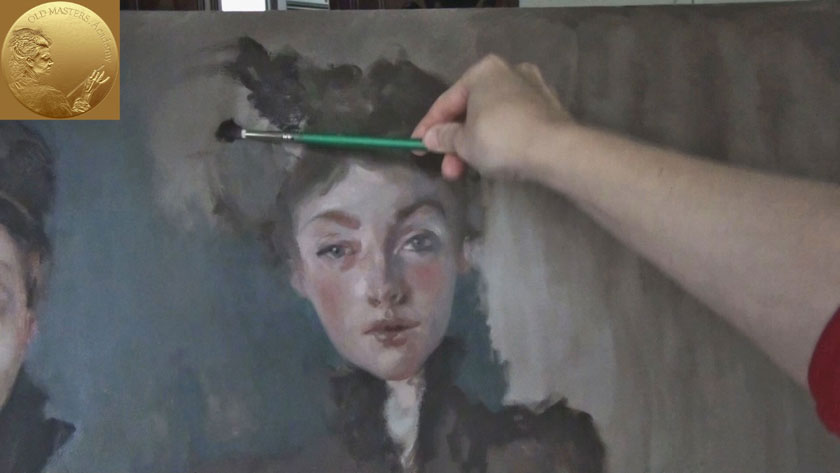
Until now the face was painted in cold mid-tones. Now we can add some light and warm tones to the lighter areas of the face. This will add the color depth to the portrait and make it more colorful for both: the warm nuances are used.
We make the background a little darker in order to mark out the face. French Ultramarine, some Brown and Buff Titanium are mixed for the purpose. The paints are mixed without medium.
Here’s an interesting detail. We use the same brush which was used to paint the background. There are remains of the blue-grey paint on the brush. We rub these remains into the areas of the shadows between the nose and the right cheek, and into the hair. Thus the blue-grey color mixed with the flesh color on the canvas results in the new shade of the cold color of the shadows.
Step-by–step we are attaining the likeness and the face is shaping. Until this stage the face was painted with neutral colors, and now we add distinctive nuances. For example, we add a single brushstroke to the mouth using dark red-brown color. We also add some more details to the eyelids and eyes.
The portrait is almost completed. Now we can add the final strokes to the portrait using virtuosic brushstrokes with the necessary color combination. It isn’t too late to correct some shapes of the face at this step if needed. The paint is still wet, therefore we go on with the ala-prima. This gives us the flexibility to add or remove the paint as well as paint over if necessary.
As you see we keep on working on all the areas at the same time. We have to add a brighter color to some places – for example to the cheek. Here and there we also have to adjust the shapes.
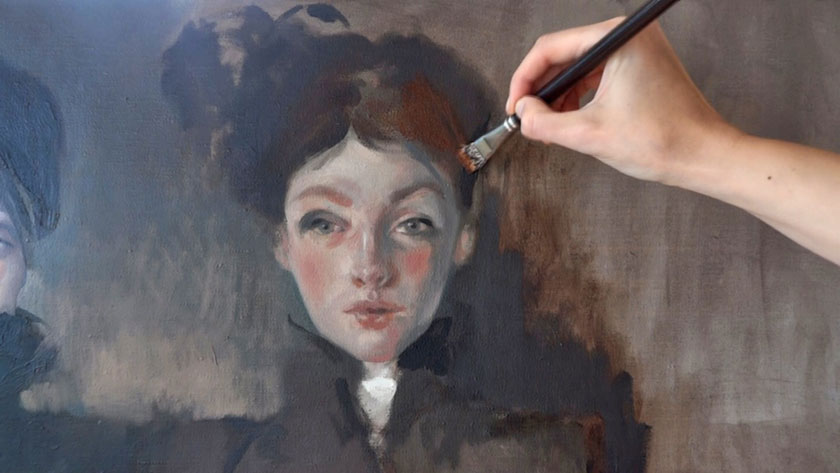
The hair and the hat are painted freehand, loosely enough. The hair is made as the light-brown mass. We add shadows with the dark brushstrokes to the top of this mass and paint separate strands of hair that are tossed about the forehead. As we still keep on with the alla-prima, the darker strokes on the canvas mix with the under-layer.
A Stiff round brush is used to paint hair and the headwear. The loose manner of painting can be applied here. There is no need to be precise at this point. A certain roughness and non-polishing will add charm to the picture. You can express yourself in the emotional way, and derive pleasure from the process.
We can apply the final touches at last. This is the final step in the portrait making. This is the chance to add character.


