Art Lesson 34, Part 6
In this lesson, you will discover How to Use Glazes in Oil Painting
Learn how to paint like the Old Masters!
Old Masters Academy Online Course
Self-study, self-paced online video courseLifetime membershipOne-time payment: $487Enroll Now!Personal Tutoring online + Online Course
Unlimited tutoring by the Academy teachersLifetime membershipOne-time payment: $997Enroll Now!« Back to the Art Lessons List
How to Use Glazes in Oil Painting
This is the final stage of the painting process. We are going to explore the potential of the Glazing method. The best Glazing Medium is, of course, Stand Oil. In this series of exercises, we use Linseed Oil; however, when we do a proper composition, not a study, we can use DIY Sun-Thickened Walnut Oil. It yellows a bit less, which is important in painting light areas. However, for exercises, it’s perfectly fine to have Linseed Oil.
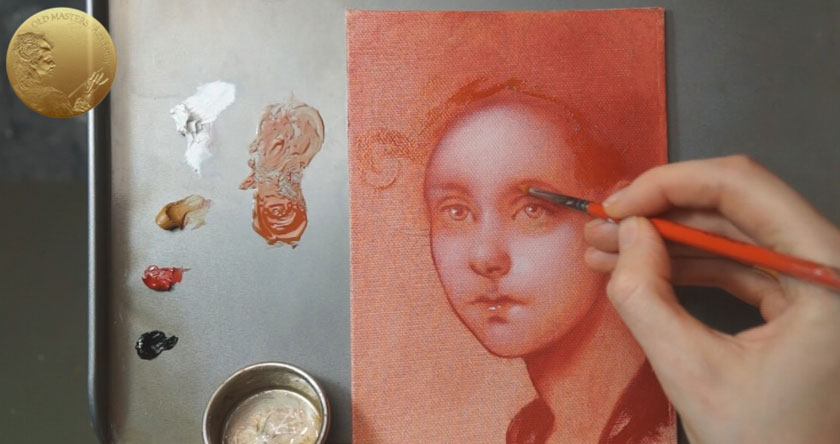
We mix Yellow Ocher with Red and add undiluted Stand Oil to the mix. Have a look at how viscous and transparent the paint becomes. We refresh our Grisaille layer, which is completely dry, with a new film of transparent glazes.

Now, we have to cover the face with semi-opaque layers of Velaturas to overcast the lower Grisaille. Gradually, the face becomes covered with a gentle cloudy film of Velatura.
At the same time, we have to pay attention to the background as well – we overlay the glazing layer over an Imprimatura by energetically robbing the viscous glaze over the canvas.
Now, we take undiluted Titanium White and apply it over a wet glazed surface. Then, we change the brush for a clean one and gently spread the paint, creating a soft transition from highlight to half-tones. That is it for this session. Now, we have to wait till the glazes dry; that takes time. To increase the drying process, we can from time to time expose the painting to sunlight.
Now, when the first portion of the glazes has dried out, we are about to continue with glazes. We prepare a cold Velatura for shading. We mix White and Black and add Stand Oil, which gives us a semi-transparent grey color. We made a very delicate mix for that – this grey color has almost the same tonality as the reddish lower layer, but it adds those cold nuances that are so necessary here.
We also continue with the hair painting and dark background.
Now, we can leave the painting aside to wait till it dries.
Time has passed. The painting surface is dry, and we can continue with a new series of Glazings and Velaturas. First of all, we enhance the areas of the face, doing one more layer of Velatura.
Then, we continue to work on details – we refine the shape of the lips and eyes. And again, we set aside the painting to dry.
We continue with shades and halftones of the portrait. This is quite repetitive work of applying Glazes and Velaturas alternately allows us to build up the volume of the surface.
We skip the repetitive process, and here we can see the end result of the Glazing method we did over the preparatory Grisaille.
It turns out that we paint for a very short amount of time. After that, we have to wait for days or weeks for the paint to dry. That’s why there is a very good practice of working simultaneously on many artworks. While some works are drying, you work on others; or, work on new ideas.


