Art Lesson 42, Part 6
Discover how to Paint a Female Portrait
Learn how to paint like the Old Masters!
Old Masters Academy Online Course
Self-study, self-paced online video courseLifetime membershipOne-time payment: $487Enroll Now!Personal Tutoring online + Online Course
Unlimited tutoring by the Academy teachersLifetime membershipOne-time payment: $997Enroll Now!« Back to the Art Lessons List
How to Paint a Female Portrait

Session Seven
For the next step, we take Burnt Umber with Stand Linseed Oil. We proceed after the canvas has completely dried. The lighter Underpainting is glazed very thinly, so it shows through the top layer. The multiple Glazing layers increase the saturation of the colors. We already have the main features of Madonna’s face in place, so we can work on colors and tonal values with a series of colorful Glazes. For these Glazes, we use Scarlet Lake mixed with Stand Linseed Oil. For this task, soft brushes like Mongoose or Badger are most suitable. You can also spread the Glaze with your fingers. We deepen the tonal volumes of the shaded areas by applying semi-transparent shades. For that we use pure Burnt Sienna mixed with Stand Linseed Oil.
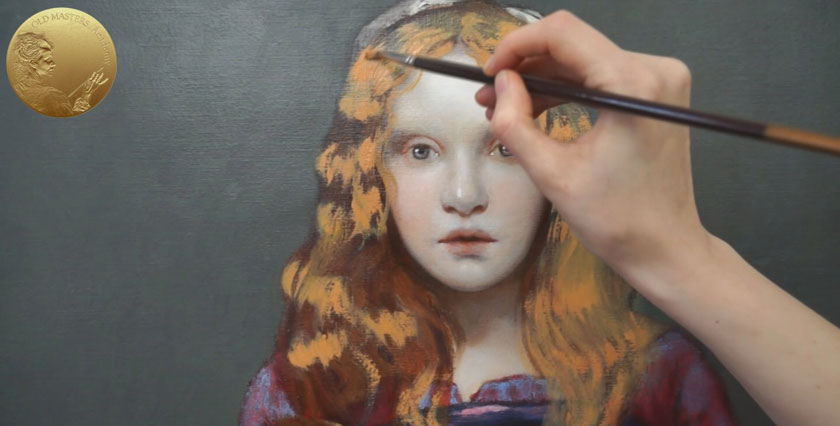
Let’s move on to the hairstyle. We mix Titanium White, Yellow Ochre and Venetian Red without any Medium. A stiffer Hog Brush works well for this task. Strokes are applied thickly in areas with highlights. The series of lighter brushstrokes will create a wavy hairstyle. The brownish Glaze, which was applied at the beginning of this session, is still sticky, but because it is quite thin, it doesn’t intermix with the upper paint.

Session Eight
To depict a gentle cast shadow under the hairs, a transparent Glaze of Charcoal Grey thinned with Stand Linseed Oil is applied. A soft brush is used for this purpose.
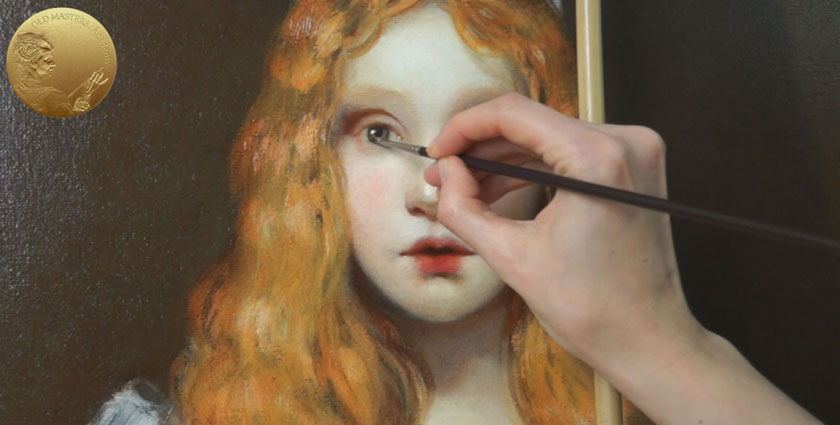
This Glaze is painted as a gradient, so we gradually reduce its thickness until it fades away. This allows the transition between shade and light to be very gradual and soft. To bring life into the eyes, we will paint a small yet pastose dot of pure Titanium White in the eye corner.
Other highlights are painted with pure White, mixed with Stand Linseed Oil. We also touch up the irises of the eyes, creating a reflection of light, using the same pure White.

The shadow of the open lips is intensified, which slightly changes the facial expression. The mouth’s corners are painted with Burnt Sienna and Venetian Red thinned with Stand Linseed Oil. For reflected highlights, we add a dab of unthinned pure Titanium White. We enhance the shaded side of the nose with a Charcoal Grey Glaze. We go as thin as possible with this shade, applying the glaze very thinly.
Session Nine
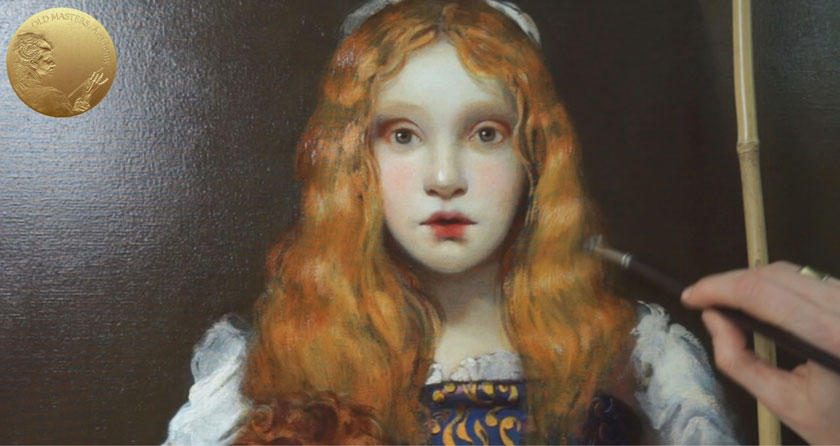
We will continue over the completely dry surface. We apply the light Glaze over the hairstyle, using the same mix of paints as we did for the curls’ highlights. This time, the mix of Titanium White, Yellow Ochre and Venetian Red is thinned with Stand Linseed Oil. The less Medium you add into the paint mix, the more opaque the Glaze becomes and vice versa. To emphasize the hairstyle’s volume, we depict cast shadows under the hairs. Like we’ve done before, we do it with a gentle Glaze of Charcoal Grey. Now we can set the canvas aside to dry or work on other parts of the composition.
Session Ten
We continue glazing over the completely dry surface. For the next Glaze layer, we mix Burnt Sienna with Stand Linseed Oil. We now cover the face and neck area, all over. It is ok to go beyond the borders and cover the neighboring areas. When Glaze is applied on top of a very light Underpainting, it leaves a subtle color film that adds extra liveliness. At this stage, the hair looks flat, so we add transparent shades to make them volumetric. We mix, as always, Burnt Sienna with Stand Linseed Oil.

Session Eleven
We continue glazing over the completely dry surface. More highlights are added, using the Dry Brush method. Remember, Dry Brushing doesn’t require any Medium. We will choose pure Titanium White; in the next session, it will be glazed over.
Session Twelve
For the next Glaze layer, we use Burnt Umber and Stand Linseed Oil as a Medium. Once the previous layer is dry, we can continue to glaze. All these interspersed layers create a rich optical effect. We can continue, almost endlessly, with the sequence of layering transparent and opaque layers.
The lips should be glazed to look fresh. You can choose any bright Red for that purpose. As a Medium we need, as always, Stand Linseed Oil.
Attention to detail is important. We will make the little dimple under the bottom edge of the lower lip, warmer and deeper. Such detail should be carried out gently and preferably in thin, transparent or semi-transparent Glazes.
The eyelids can also be touched up with an exaggerated reddish Glaze.
Session Thirteen
These are the final touches and they are done over a well-dried surface. For the Glaze, we use Burnt Umber mixed with Stand Linseed Oil. We slightly darken the shaded areas with a very transparent Glaze. Lighted areas should be left untouched.
This is the final correction for the shape of the nose. The mix of Titanium White and Burnt Umber is applied densely. We do not add any Medium to the mix. Even at this stage, the shape of the nose can be amended.
Using the same mix, but thinned out a little more with a Medium, we touch up the upper eyelid to make it look more lighted.
For blush on the cheeks, we mix Titanium White and Scarlet Lake with no Medium. First we apply the paint as a brush stroke, then we use a clean, soft brush to spread the mix around.
Places that look uneven can be overpainted with a quite opaque mix of Titanium White and Burnt Umber. No Medium needs to be added.
We draw strongly pronounced eyelid skinfolds with a small-sized brush. For this purpose, we mix Venetian Red and Burnt Umber without any Medium. Various places can be glazed with the same mix, thinned with Stand Linseed Oil. It makes them look warmer.
Now we do the final touches with the same Glaze over the hairstyle. We gently deepen the shadows with translucent layers of our Glaze.
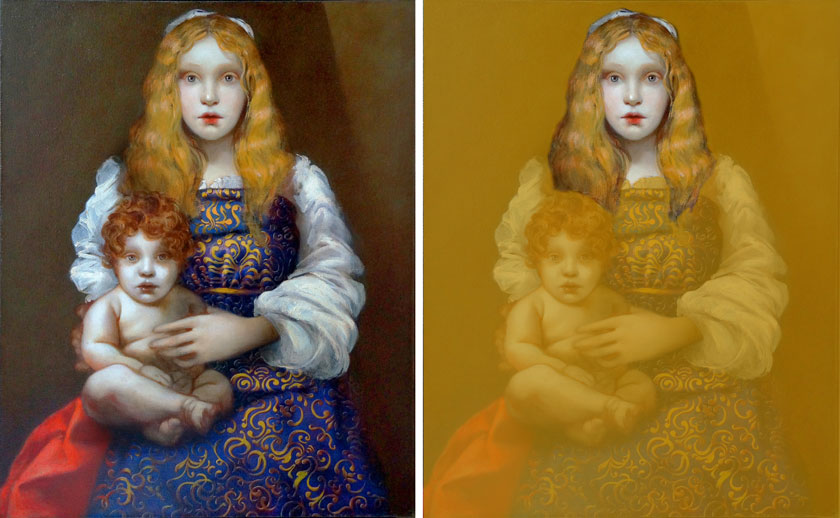
In my opinion, I have achieved the creative task and the portrait is complete.
To recap, here is a high-speed demonstration of the portrait painting process.


