Art Lesson 27, Part 4
Discover Oil Painting Before and After Varnishing
Learn how to paint like the Old Masters!
Old Masters Academy Online Course
Self-study, self-paced online video courseLifetime membershipOne-time payment: $487Enroll Now!Personal Tutoring online + Online Course
Unlimited tutoring by the Academy teachersLifetime membershipOne-time payment: $997Enroll Now!« Back to the Art Lessons List
Oil Painting Before and After Varnishing
After we have finished the painting, we have to varnish it.
This is how the painting looked before varnishing and after it was varnished. As you remember, it is not advisable to varnish the painting till it’s completely dry, which is about 18-24 months, depending on the thickness of the paint. Before that, we can apply the Retouching Varnish as a Temporary Protection Varnish that can be used over a touch-dry paint surface. But it’s optional. I, for example, decided not to use a temporary Varnish, but waited about 14 months before applying a normal Picture Varnish.
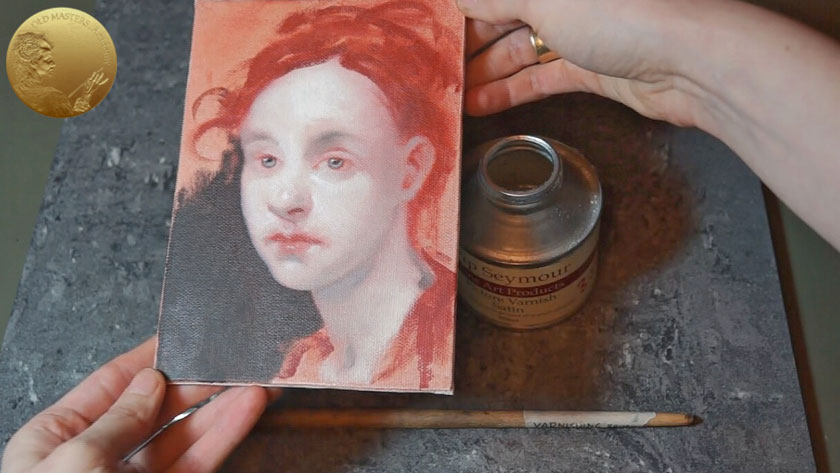
We have to have a special Brush, dedicated exclusively to varnishing purposes. Look, we labeled it as Varnishing Brush. This is a flat synthetic Brush. Try to keep it separate from your painting brushes, to avoid mixing them up. Your Varnishing Brush should be absolutely free from any Pigment particles.
The varnish we choose is Satin Picture Varnish. Have a look how the paint surface looks – in some places, mostly in dark areas, the paint is slightly sunk in. The surface looks uneven. All these natural defects will be resolved after we varnish the painting.
Place the canvas flat on the horizontal surface and coat the canvas with the varnish, moving the brush in a parallel direction. Check that you have covered the whole painting without missing any fragments. Just move the painting and look at it under different angles to see if you missed covering any fragments. You will detect it, as freshly applied varnish will look glossy, leaving uncovered fragments matte.
Then, we leave the canvas horizontal for 10-15 minutes; the varnish should spread evenly on the surface and dry out a bit. After that, we can place it face inwards vertically, against a wall, to dry overnight. This protects the canvas from the dust.
When the first coat of varnish is dry, we can varnish it a second time, but now at right angles to the first.
Two coats of Varnish should be enough for proper protection. Again, first we leave the canvas flat for 10-15 minutes. Then, we place it vertically against the wall.
This is how our painting looks before varnishing, and how it looks after being varnished. Picture Varnish protects the paint layer against moisture, gases, dust, and to a certain extent, from the effects of sunlight; in addition, Picture Varnish improves the optical properties of Colors in the painting. As you see, Varnish restores the lost brightness of Colors and depth of Tones. The painting has a pleasant, even surface of paint.
We have chosen Satin Picture Varnish; it is up to your personal preference to choose from the range of glossy to matte varnishes – they produce different types of final looks for your painting: from high-gloss to a dull finish.