Art Lesson 22
Discover Smooth and Impasto Textures – Oil Painting Texture Techniques
Learn how to paint like the Old Masters!
Old Masters Academy Online Course
Self-study, self-paced online video courseLifetime membershipOne-time payment: $487Enroll Now!Personal Tutoring online + Online Course
Unlimited tutoring by the Academy teachersLifetime membershipOne-time payment: $997Enroll Now!« Back to the Art Lessons List
Smooth and Impasto Textures – Oil Painting Texture Techniques
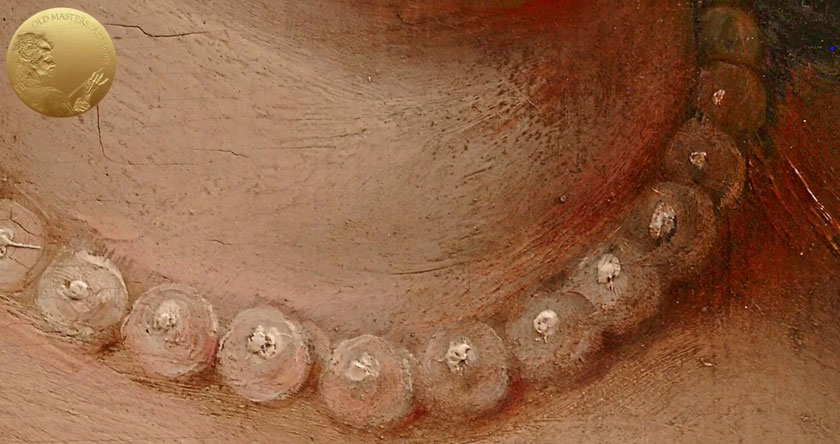
In this Video Lesson, we are going to look at the texture of Underpainting layers and use its special language for creating the interesting visual effects of Smooth and Impasto textures. Speaking of texture in a painting, we are referring to the nature of the painted surface. The surface could vary from absolutely flat and smooth to Impasto, when the paint layer creates an almost sculptural effect of a low relief. Textured Underpainting plays an important role in the multi-layered painting of the Old Masters. They used different varieties of textures to influence our perception of their artworks. We can we say – it’s one of the effective tools of oil painting. For example, Rembrandt highly valued an Impasto surface, while Titian could use a dense, smooth surface that overlays the texture of the canvas in a flesh depiction, leaving the canvas texture around it. In this way, he achieved his creative vision through varieties of textures in one artwork. (Of course, when we see the original painting of the Masters, the textures of their paintings are much more visible than we see in the photos).

Textured surface on an Underpainting can vary from flat to Impasto. Let’s test this in the following exercises.
For this exercise, we need to outline the guidelines from Worksheet #12; use the Masking Tape to protect the areas around our painted samples.
And only after that we are going to proceed with the initial textured surface, which represents the Underpainting layers of a painting.
First of all, we cover the upper part of the Canvas with a thin layer of opaque light Paint, rubbing it into the Canvas with a stiff Hog Brush.

Because the Paint is Opaque and its covering power is high, it covers the white surface of the Canvas very densely.
On the other hand, at the bottom, we apply the Paint extremely thickly. The Hog Brush helps us to create a rich texture, with visible grooves left by Brush hair. Gradually, we cover the whole surface of the Canvas with our Underpainting, from Impasto to the smooth spread of the Paint.
That is it for today. Now, we have to wait till the Paint dries. As we understand, the Paint in Impasto layers takes much longer to dry than thin layers; we have to set aside this Chart for at least two weeks, exposing it to sunlight from time to time, but generally try to keep it in a warm, light place – such conditions speed-up the drying time.
When our Underpainting is completely dry, we can proceed with the upper layers. First of all, let’s see how the lower layer’s texture can affect the Glazing layers applied on the top.
For that, we choose a completely transparent Ultramarine Blue, semi-opaque Scarlet Lake and an absolutely opaque Venetian Red. As a Glazing Medium, we use Liquin Original. We thin the Paint with the Liquin and apply the glaze with a soft Brush. Oh, yes, if you wish, you can use the Masking tape here as well to make a very neat sample of glaze with precise borders.
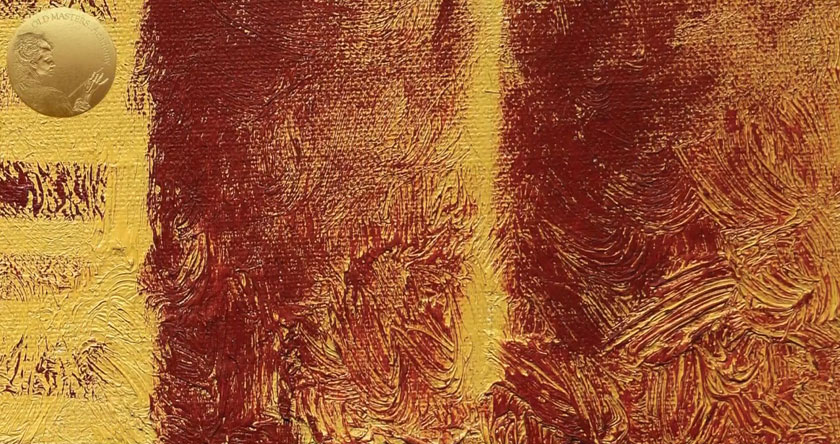
After the glaze layer is spread out, we can finish it up with smoothing it with a flat soft Brush. We tear off the tape and proceed with the opaque Venetian Red, also with the help of Masking Tape, making the glaze sample accurately executed with tidy and neat borders. You see how powerful the opaque pain is – even generously thinned with a Liquin (in about the same amount as a transparent Ultramarine was thinned), it still has great covering power. When the transparent Blue and opaque Red become dry, in about 2 to 3 days, we proceed with the semi-opaque Paint. Now, we can remove the Masking Tape and have a look at how the underlying Paint texture affected the visual appearance of the surface. At the top, a very thin layer of Underpainting was applied; we can see the type of waves our Canvas has. The lower we go, the more interesting optical effects we see.
The Optical surface of a paint layer, its complex seeable surface, depends on the lower and upper layer of Paint. Transparent Ultramarine creates a more sophisticated surface than semi-opaque and opaque Red Paints. You can see that a transparent Blue Paint just slightly covered the Underpainting prominent parts and accumulated in the tiny grooves of the relief Impasto.
But in the case of opaque Paints, if we changed the proportions towards a much greater amount of Liquin and a lesser amount of Paint, we would achieve a more sophisticated effect. So far, this opaque Red covers the Impasto Underpainting so evenly, almost without letting the Yellowish underlying layers show through it. Well, this is the effect of a textured surface exerted in case, when we have already finished the painting in Glazings.
But how else does the textured Underpainting affect the regular painting process, aside from optical? When we proceed with solid dense brushstrokes. Let’s see. For that, we need two types of Brushes – one type should have stiff hair – a Hog Brush suits brilliantly for that; the second type of Brushes should be soft Brushes. As for soft hair type brushes, we can choose either the Mongoose or Badger, or a Synthetic type of Brush. Here, we test Hog and Mongoose Brushes. Please, ignore this label; it’s incorrect it should be written “Mongoose”.
So, to do all testings, we choose Venetian Red. First, we test what kinds of strokes a stiff hair Hog Brush can execute over different types of textures. What we will do is the following: we will make paired brushstrokes with different pressure – one stroke with equal pressure on the Brush from the beginning to the end, and a second one with the same pressure from the beginning but gradually lifting the Brush up.
Then, we do the same with a soft hair Brush: one stroke with equal pressure, another one with more pressure at the beginning and less pressure at the end of stroke. What we can say by looking at this Chart? The rougher the surface of the Underpainting, the more intermittent and broken the Brushstroke. The softer the Brush, the more it responds to a rough, Impasto surface. The same level of pressure applied in this test produces different results that are highly dependent on the texture of an Underpainting.
Now, let’s check how a “Dry Brush” method works over different textures. We start with a stiff Hog Brush – we can feel how easily the Paint can cover the even surface of an Underpainting and how the character of the upper layer changes when we try to do a Dry Brush method over a high relief Impasto Underpainting.
When we do the test using a soft kind of Brush, we got more or less the same result. However, by using a soft Brush, there is a tendency to smooth the Paint softly and fill in all the deepenings with the Paint. So, we had to refrain from applying any pressure on the Brush. I must admit that a Dry Brush method is more pleasing to do with a Hog Brush because it is a barbarism to scrub over a rough surface with a soft-hair Brush that is not designed for such kinds of treatment. We did try the test exclusively for the sake of scientific research. For a Dry Brush method, always use a rigid Hog Brush.
When we complete the exercise, we remove the Masking Tape and do all the necessary labeling. Now, we know how the different textures of the Underpainting can affect the final result of the painting.
What you need for the task:
- Worksheet #12
- Prepared Support – Canvas, Canvas Board or Oil Painting Paper A3
- Masking tape
- Transparent Ultramarine Blue, semi-opaque Scarlet Lake and absolutely opaque Venetian Red
- Some Transparent, Semi-Transparent and Opaque Colors
- Hog, Synthetic and Mongoose Brushes
- Liquin Original for Glazings


